menu bar 10 menu bar 2 menu bar 3 menu bar 4 menu bar 11menu bar 5 menu bar 6
Showing posts with label cuisine. Show all posts

Friday, March 8, 2013

Wine. Yes, It Is Good.

I like wine. I drink a lot of it. Andrew told me that if I quit my day job and did design full time that I might have to cut back on my wine consumption. I told him that I'd figure it out and that I would still enjoy my wine, thank you very much. Either way, I thought it'd be fun to share with you all what I've been drinking lately.


I'm definitely no wine expert. Ask me about aroma, tannins, legs, or all that other crap and I'll probably look at you like you're crazy. I honestly have not a clue. However, I do know that these bottles of wine are pretty damn good and will end up in my cart every time I stock up again. The Bonterra is on the pricier end for me at $15. I try to go for anything between $8 and $12. That being said, I've had a lot of bad wines at that price, but I've also had a lot of good ones and these have definitely stood the test for tasty. 

The La Posta is the one I will always have on hand. When we stock up, I usually snag a few bottles in case we're headed to a friend's house and we need to bring a bottle of wine. The Stump Jump has become a new favorite that is reasonably priced-- not bad and nothing super extraordinary, but you can't really go wrong. It's a no-brainer. 

Do you enjoy drinking wine? I like to grab a glass to drink while I'm cooking and then enjoy a little more with my meal. Hope you're able to find these at one of your local wine sellers. And if you do, let me know what you think!

Monday, April 2, 2012

Santa Fe Black Bean Salad

For those of you that missed me the last few days, I am officially back! I took a quick trip up to New Jersey and New York City to visit a friend and attend a bridal shower of another friend. I had promised that later last week I would share the recipe to my black bean salad that so many of you requested. Obviously, I failed tremendously at getting it posted later that week. A busy week leading up to Spring Break plus our quick trip all led to me having no time. So what better way to get back to my blog than to finally share this recipe you've all been waiting for. And I can also now officially say that I'm on Spring Break for the entire week! Woohoo!


Santa Fe Black Bean Salad

2 15 ounce cans of back beans, drained
2 cups whole kernel corn
1 small onion, diced
4 garlic cloves, minced
2 tsp chili powder
1 tsp ground cumin
2 Tbsp lemon juice
2 Tbsp chopped cilantro
1 tsp salt
1 avocado, diced
1 tomato, diced

Combine and toss ingredients, adding avocado and tomato right before serving. Serve with tortilla chips.

This is one of the most simple, yet flavorful recipes that I've made. I absolutely love making this when we have barbeques or backyard parties in the summer. It is perfect for a quick snack as well. The flavors really set in even more so by the second day, so I often quickly make it the night before I plan on eating it.

Wednesday, March 28, 2012

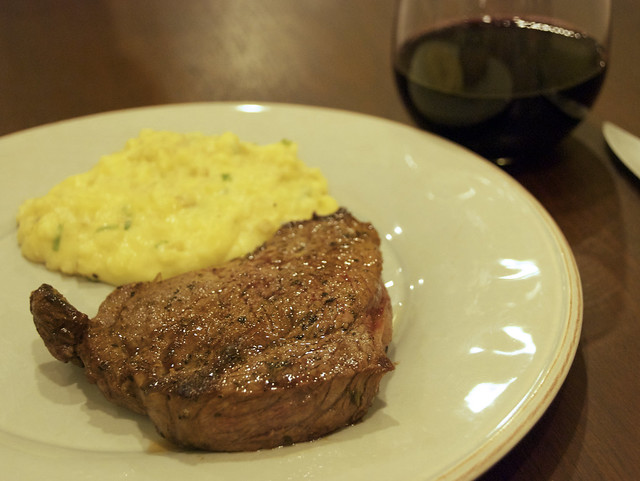
Beef Tenderloin with Potato Risotto

I'm not one that usually needs meat in my life, but Andrew is part Irish, part English, and grew up with meat and potatoes on a regular basis. Aiming to please once in a while, and wanting to try something new, I decided to go the meat and potatoes route the other night. This beef tenderloin, accompanied by potato risotto, is a recipe that worked perfectly for a Friday date night at home. The tenderloin was seasoned just perfectly, and the potato risotto was rich and creamy-- a perfect side that I'll be sure to use with other meals.


Want to have a go at this delicious (and fairly simple) gourmet dinner? I'm happily passing on the recipe below.

Ingredients
  • 1 tablespoon butter
  • 1 cup finely chopped onion
  • 1 pound Yukon Gold potatoes, peeled, cut into 1/8-inch-thick slices, then 1/8-inch cubes
  • 1/8 teaspoon cayenne pepper
  • Coarse kosher salt
  • 1 1/2 cups low-salt chicken broth
  • 1/2 cup heavy cream
  • 1/4 cup grated Parmesan cheese
  • 1/4 cup chopped fresh chives
  • 2 6-ounce beef tenderloin steaks
  • 1 1/2 tablespoons chopped fresh thyme
  • 1 tablespoon olive oil
Directions for the Potato Risotto

Melt butter with the onion in a large deep sauce pan. Cook the onion, stirring occasionally, until the onions are clear. Add the cubed potatoes and cayenne pepper, and sprinkle with salt and pepper. Add the chicken broth and bring to a boil. Reduce the burner to medium heat and simmer until the potatoes are almost tender (about 8 minutes). Add cream and continue to simmer for about another 10 minutes. At this point, the potatoes will begin to hold their shape. You'll want to continue stirring the potatoes so they do not stick to the pan. Finally, stir in chives and the Parmesan cheese.

Directions for the Tenderloin

Sprinkle coarse salt, pepper, and thyme on both sides of the steak. Rub the spices into each side of the steak. Heat the olive oil in a skillet on a medium-high burner. When the oil is heated, add the steaks and cook until they are done as desired. I found that for a medium steak, each side needed 4-5 minutes.


This meal went fabulously with a red glass of wine and the best chocolate cake ever. We enjoyed a bottle of La Posta Cocina Malbec with the meal which ended up being the perfect pairing! What have you been cooking up in the kitchen lately?

P.S. I know a lot of you have been requesting my black bean salad recipe, so stay tuned for that recipe in the next few days! :)

Sunday, March 25, 2012

Happy Hour at Home

What better way to enjoy a Friday evening at home on the roof top deck with your own little happy hour. While it's fun to meet up with friends after a long work week, sometimes it's more enjoyable to kick back and relax. And that is just what we did this weekend. On the menu was homemade crostini and crab dip, a black bean salad with tortilla chips, and a couple of home brews. A pup by our side and a chance to enjoy the sunset over Baltimore City made this may favorite part of our weekend.


What was your favorite part of the weekend?

Wednesday, March 21, 2012

Chocolate Layer Cake with Milk Chocolate Frosting

When I was in high school, I used to bake desserts for the coffee shop in my hometown called The Electric Brew. I would spend the day at school and the afternoons and early evenings baking. In that time, I baked hundreds of cookies, muffins, cakes, quick breads, brownies, and other assorted things. And I got pretty good at it. I had a lot of experience going into it all considering that my mom is a baker and owns the best European-style break bakery in the area (I'm not being biased!) called Rachel's Bread.

I asked Andrew last week if there was anything in particular that he wanted to eat for dinner this week, and his response was just, "Desserts. You make the best desserts." So on a quest to come through for him, and with the excitement of getting back to what I'm truly the best at in the kitchen, I scoured the web for a new recipe to try. And what I found was the most delectable chocolate cake I think I've ever had. Mind you, it may be incredibly rich and take a bit of time to make, but in the end, I guarantee it is all worth it!


Ingredients for the Cake
  • 2 cups all-purpose flour
  • 2/3 cup unsweetened cocoa powder (not Dutch-process)
  • 1 1/2 teaspoons baking soda
  • 1/2 teaspoon salt
  • 2 sticks (1 cup) unsalted butter, softened
  • 1 cup packed dark brown sugar
  • 3/4 cup granulated sugar
  • 4 large eggs at room temperature for 30 minutes
  • 2 oz unsweetened chocolate, melted and cooled
  • 1 1/2 teaspoons vanilla
  • 1 1/2 cups well-shaken buttermilk
Ingredients for the Frosting
  • 2/3 cup whole milk
  • 3 large egg yolks
  • 1 tablespoon plus 1 teaspoon all-purpose flour
  • 1 1/3 cups confectioners sugar
  • 1 teaspoon vanilla
  • 3 sticks (1 1/2 cups) unsalted butter, cut into tablespoon pieces and softened
  • 8 oz milk chocolate, melted and cooled (I used a little under 2 Lindt milk chocolate bars)
  • 2 oz unsweetened chocolate, melted and cooled

Directions for the Cake

Pre-heat the oven to 350. In a stand-up mixer, cream sugars and butter until nice and fluffy. Beat in eggs one at a time. Incorporate chocolate and vanilla until smooth. Combine flour, cocoa, baking soda, and salt in a separate bowl. Mix in flour mixture and buttermilk alternately. Pour the batter into 2 greased, round cake pans and bake 25-35 minutes or until a toothpick comes out clean. Let cakes cool in the cake pans for about 10 minutes and finally invert the cakes onto a wire rack.

Directions for the Frosting

Begin heating the milk until hot, but not boiling in a small quart-sized saucepan. In a bowl, combine egg yolks, flour, and 1/3 cup confectioners sugar along with a pinch of salt. Pour milk into egg mixture and whisk continually.  Put mixture back into the sauce pan and bring it to a low boil while continually whisking. Reduce the heat and continue whisking until the mixture becomes a thick custard. Transfer the mixture to a large mixing bowl and let cool for 45 minutes to an hour.

Once cooled, add vanilla and remaining amount of confectioners sugar and mix well. Beat in softened butter until smooth and creamy. Finally, pour in melted chocolate and beat the frosting until nice and airy.

Directions for Assembling the Cake

Using a serrated knife, cut each cake into two horizontal layers. Use about 1/2 cup to 3/4 cup of frosting between each layer and then use the remaining frosting for the top and sides of the cake.


The cake turned out very light, moist, and fluffy, yet extremely rich. We enjoyed a piece of cake along with some of our homemade mint liqueur. This is most definitely not your every day cake and would be perfect for a special occasion or surprise.


Needless to say, this must be the best chocolate cake that I've made to date, and would highly recommend trying it! Do you have any special dessert recipes that you'd like to share? I would love to try them!

Sunday, October 30, 2011

The Best Granola Ever

I may be biased because this is the recipe my mom always used and I grew up eating it. But this is the best granola ever. I could honestly eat this every morning and be a happy person. Aside from being delicious, there are other great bonuses to this recipe as well. It's ridiculously simple to make, it's not pumped full of preservatives and chemicals like your boxed breakfast cereal, and it's very inexpensive to make. I like to use organic ingredients which I can find in the bulk section at either Wegmans or Whole Foods. While some of the ingredients such as honey and vanilla may be costly up front, they last for a while and you can use them for several batches.

In a large bowl, mix:
6 cups rolled oats
1/2 cup brown sugar
3/4 cup oat bran
3/4 cup wheat germ
1 cup nuts (I always enjoy dry roasted peanuts)
1/2 cup sesame seeds
1/2 cup shredded coconut

Add the following and mix well:
1/2 cup canola oil
1/2 honey
1 teaspoon vanilla


Spread the mixture evenly on two baking sheets and bake for 15 minutes at 375 degrees. Stir mixture while still on the baking sheet and bake for 5 more minutes and repeat. Total baking time is 25 minutes. After the granola is finished baking, let it cool on the baking sheets. I use a spoon to loosen the cooled granola and scoop it into a cereal container for storage.


Finally, eat the granola! Yum! Eat it with milk (that's what I like best!) or with yogurt as my mom often does.


And if you feel like checking out a few more of my mom's recipes, head over to her Facebook page, La Bonne Vie. She write a weekly column for my hometown paper and always includes a scrumptious recipe.

Thursday, August 11, 2011

Homemade Pesto & Grilled Salmon


Over the Fourth of July weekend, my aunt brought us her basil plants to plant-sit while she and my uncle took a family trip out west for several weeks. The basil plant, one sweet and one globe, started out fairly full, but by the end of July they were both huge. We used some of the basil here and there in our cooking, including grilled pizza with fresh tomatoes and basil leaves. But it seemed we could not keep up with the pace in which the plants were growing. Last night, I decided I would make some pesto with the ever growing sweet basil plant.


Since I decided to make pesto, Andrew fired up the grill for some pesto salmon-- one of my favorites ways to prepare the fish. It's a quick and simple recipe and you won't regret making the pesto from scratch.

Homemade Pesto

2 cups of packed basil leaves
1/3 cup pine nuts (walnuts work fairly well as a substitute if you can't get pine nuts)
1/2 cup olive oil
1/2 grated Parmesan cheese
4 decently sized cloves of garlic
salt and pepper to taste

Pack the basil into a food processor along with the pine nuts.


Pulse the basil and pine nuts a few times until they're finely chopped. Add the garlic and pulse again. Slowly add the olive oil while food processing. Blend in the Parmesan and salt and freshly ground pepper to taste.
Easy as that!


For the salmon, I like to make a little tin foil boat. I place the salmon in the center, spread the pesto on top, and squeeze some fresh lemon juice over the pesto and salmon. Pop it on a hot grill for 15-20 minutes, checking back frequently so that your salmon doesn't get too dry.


Finally, serve it with your choice of veggie, rice, or whatnot. We went with corn on the cob last night.


Yum, yum, yum! So tasty that even Lilah had to guard the grill last night in hopes that she would get a little morsel.


Unfortunately for her, she wasn't as lucky as she had hoped. :)

Thursday, July 7, 2011

Homemade Samoas

Just because they were that good, I thought I'd share the recipe for those homemade samoas I wrote about last week. My parents really enjoyed these this past weekend during their visit. Plus these are by far my favorite Girl Scout cookie so what could possibly be better than the homemade version?


Ingredients for Shortbread
 
1/2 cup sugar
3/4 cup butter, softened
1 egg
1/2 teaspoon vanilla
2 cups flour
1/4 teaspoon salt

Ingredients for Toppings
3 cups shredded coconut
3/4lb caramels
3 tablespoons milk
1/4 teaspoon salt
1 cup chocolate chips


The first step is to make the cookie base. It is a shortbread type base that is super quick and simple. Cream the butter and sugar together. Add the egg and vanilla and beat. Finally mix the flour and salt in with the rest of your ingredients. Flatten out the dough in a greased 9x13 baking pan and bake at 350 for 20-25 minutes until it is lightly browned.

While the shortbread cools, toast 3 cups of coconut on a parchment lined baking sheet for about 20 minutes at 300 degrees. Be sure to take the baking sheet out of the oven every 5 minutes and give the coconut a good stir so that it doesn't get too dark on one side.

Next, unwrap and melt 3/4lb of caramels along with 3 tablespoons of milk and 1/4 teaspoon of salt. Melt the caramels in the microwave on high, stirring occasionally. It takes about three minutes for all of the caramel to melt.

Finally, stir in the toasted coconut and spread the caramel mixture on top of your shortbread. Cut out squares of your cookie to prepare for the chocolate. Melt one cup of chocolate chips in the microwave. I usually melt the chocolate chips for several 30 second intervals, stirring in between. Dip the bottoms of your cookies in the melted chocolate, reserving some chocolate to drizzle on top as well.

If you decided to make these, let me know how they turned out! Enjoy!

Saturday, June 4, 2011

Grilled Jerk Chicken Focaccia Sandwiches

As you've probably figured out by now, I love summer food! So much fun to make all sorts of refreshing meals from the fresh fruits and veggies that summer has to offer. Not to mention all of the amazing options for grilling. Once beautiful weather has shown its face in my neighborhood, the grill gets used about three times a week. One of my favorite items for the summer is a Jerk Chicken Focaccia sandwich, something I've based upon the same fabulous sandwich my mom serves at her bakery.

This is the perfect summer sandwich! Last weekend, with such warm weather, I just had to make it again! This is a sandwich that has been shared with friends, has made its way to Wolf Trap with a bottle of wine during a Crowded House concert, and makes me reminiscent of enjoying food and good company during lunch at my mother's bakery. The flavors are absolutely amazing. While I only will leave you with the recipe for the focaccia and the chicken today, I often serve this sandwich with a fresh mango and pineapple salsa-- perfect complimentary flavors! Perhaps that will be for next time. For now, enjoy the recipes!

Focaccia with Red Onion and Rosemary

1 teaspoon sugar
2 teaspoons dry yeast
2/3 cup warm water
2 cups all-purpose flour
1/4 teaspoon salt
2 1/2 tablespoons olive oil, divided

1/4 teaspoon kosher salt
half of a red onion
several sprigs of fresh rosemary

1) Dissolve sugar and yeast in the warm water in a large bowl and let stand for several minutes until the yeast begins to bubble.

2) Add 1 3/4 cups of flour, 1/4 teaspoon of salt, and 1 tablespoon of olive oil to the yeast mixture. Stir until fulling combined. Turn dough out onto a floured surface and knead until smooth and elastic. Add remaining flour as needed. Place the dough back in the bowl, cover, and let rise for an hour or until doubled in size.

3) Cut dough into two equal pieces and shape each piece into flat circles. Place the shaped dough on a greased baking sheet. Cover and let rise 30 minutes.

4) Preheat oven to 475 degrees.

5) Poke indentations in the shaped dough with your fingertips. Brush remaining olive oil on the dough, placed sliced red onion rings evenly over the dough, and sprinkle with rosemary and kosher salt. Bake at 475 for 12 minutes or until golden.


Jerk Chicken Marinade

Combine the following ingredients and let 3-4 chicken breasts marinade. I usually start the marinade in the morning or the night before.

1 tablespoon allspice
1 tablespoon thyme
1 1/2 teaspoon cayenne
1 1/2 teaspoon black pepper
1 1/2 teaspoon sage
3/4 teaspoon nutmeg
3/4 teaspoon cinnamon
2 tablespoons salt
2 tablespoons garlic powder
1 tablespoon sugar
1/4 cup olive oil
1/4 cup soy sauce
3/4 cup white vinegar
1/2 cup orange juice
1/4 cup fresh lime juice
1 cup onion, finely chopped


 Bake or grill the chicken, basting frequently with the remaining marinade. When the chicken has been cooked through, slice the chicken into small pieces. Slice the focaccia to prepare for sandwiches. I usually lay the sliced chicken on a bed of mixed baby greens for the final sandwich. Enjoy!


Saturday, May 14, 2011

Thinking of a Summer Fiesta

While we've been enjoying some amazing weather the past few weeks (finally!) it seems that we have still experienced cooler weather than what is to be expected for Baltimore in May. With all of the work we've done lately with out back yard-soon-to-be-garden-slash-patio, I'm longing for those balmy summer nights. I've picked up a few things here and there to add to out outdoor space, yet I've not been able to actually use them since our patio is nowhere near completed. So for now I just daydream of the fun atmospheric additions I could make once we have reached the finished stages-- which may not be for another few weeks.

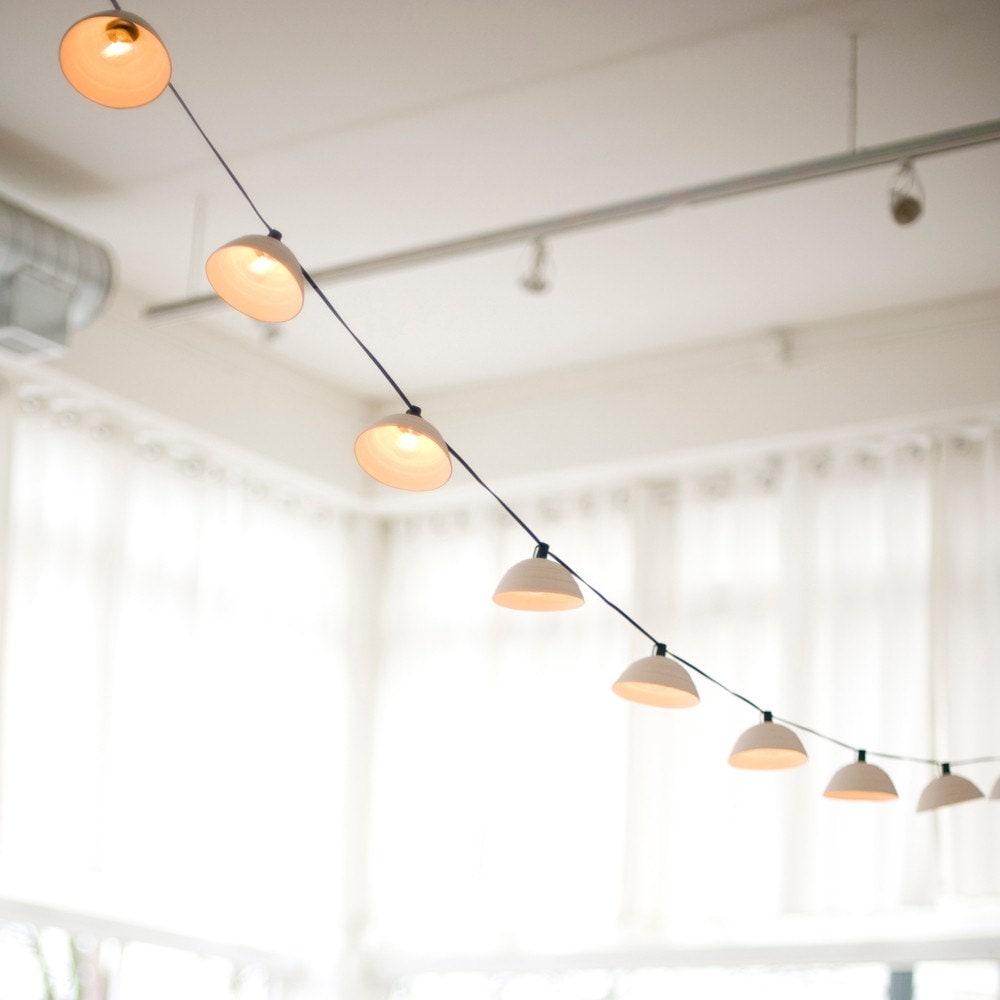
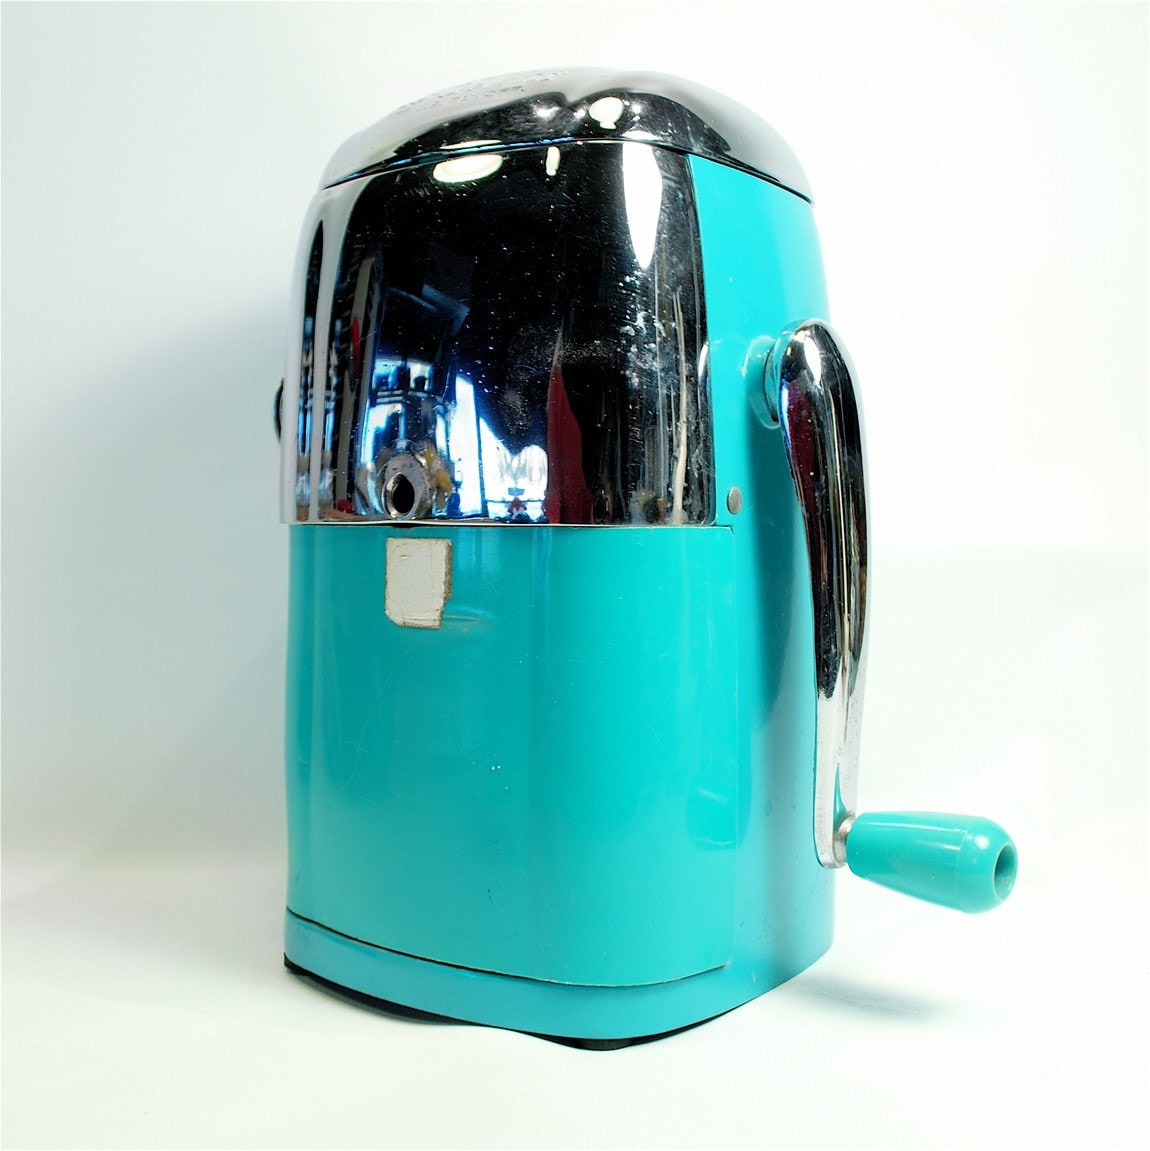
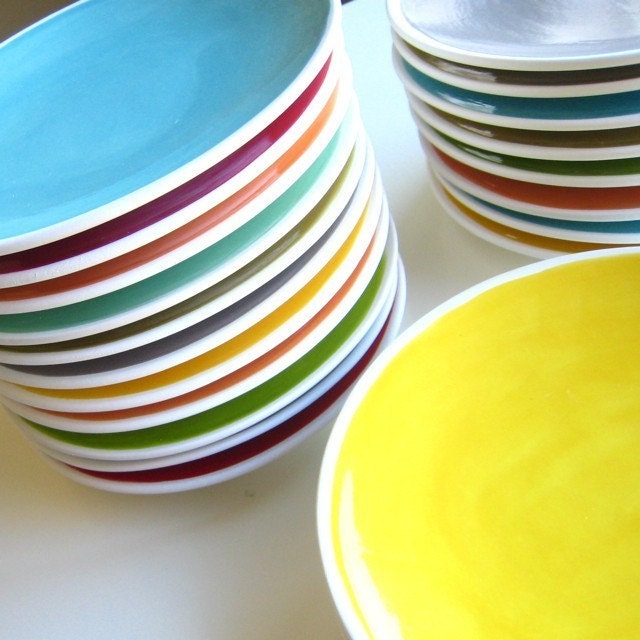
There is nothing I love more than having a few friends over for some good food and drinks on a beautiful summer evening. And here are some of the fun things I've found that would be perfect for a summer fiesta. 

via Pigeon Toe Ceramics
via West Elm
via My Fathers House
via Aedriel Originals
via West Elm
via West Elm

Sunday, April 10, 2011

Grilled Pizza for a Cool Spring Evening

The rain has passed for now and the weather reached a beautiful 65 degrees today with a sunny afternoon creeping in through the dissipating clouds. With evening temperatures just warm enough to get us thinking about the grill, we decided to go for it and fire up the big green Webster. It didn't quite feel like a kabobs kind of night. Despite being tempted we decided to save that for a summer evening still to come. Instead, we decided upon a heartier meal-- pizza.

We first had grilled pizza at a friend's house last spring and it was delicious. We had it again last summer, over a wood fire during a camping trip with my parents at Ontario's Pancake Bay Provincial Park-- an amazing spot along the Lake Superior coast. And once in the fall on our own grill. Now that winter has passed, this delicious meal has made it's way back onto the menu.

Whenever I make pizza, I make my own dough, so this was no exception. It is a simple recipe with only four ingredients-- flour, water, yeast, and salt. (I would give you the exact recipe, though I feel as though it is someone sacred considering that it is the same recipe my mother uses to make her baguettes at her bakery.) While the dough is rising, Andrew fired up the grill in order to be sure we had nice hot coals just in time for baking-- or I guess in this case grilling.

Then it was time to make the sauce. A bit of this and a bit of that in terms of spices, but one thing that I have found that makes my sauce extra special is extra garlic and a few extra glugs of red wine. While the sauce was simmering, I sliced some fresh mozzarella, tomatoes, and green onions. Meanwhile, I fried a few pieces of bacon. Once all of my ingredients were ready and the grill was hot it was time to shape the dough.

I decided to make two pizzas so I cut the dough in half and shaped it on a floured counter top. I placed the dough on the grill for about 5 minutes-- just long enough to get a little crispy and brown. Next, I flipped the partially baked dough upside down onto a floured baking sheet, topped the dough with my sauce and toppings, and popped the pizza back onto the grill for another 5 to 7 minutes. An in a matter of minutes we had two delicious pizzas-- one tomato, fresh mozzarella, and pesto. The other spinach, bacon, and green onions. The pizza was delicious and was the perfect meal to warm us up just as a cool chill began to settle on the night.

Monday, March 7, 2011

Architectural Salvage Wine Stoppers

My chair project was put off this past weekend due to rainy weather. I've been doing most of the work outside on my back deck since it involves sanding and finishing, or inevitably sawdust and stain fumes. So instead I decided to work on another upcycling project.

There are several wonderful architectural salvage warehouses in Baltimore. My favorite is Second Chance which is not just one, but I believe five huge warehouses nestled between M&T Bank Stadium, I-95, and some railroad tracks. What I love about Second Chance is that they have a different warehouse for different subcategories of architectural salvage. One warehouse, for example, is all furniture and stained glass. Another is doors, windows, and the like. A third, and perhaps often most interesting, is architectural elements. This warehouse features anything from old tin ceiling panels to beautiful stair railings to antique walk in refrigerators.

The last time I went to Second Chance, I spent some time sorting through old vintage door knobs and cabinet knobs. All of the different knobs were so much fun that I bought them on a whim knowing that I would surely find a project that would work with them. I eventually decided to turn these lovely knobs into cork wine stoppers. After purchasing the corks, I used the vintage knobs paired with a copper plumbing cap to create my finished product. These particular wine stoppers are currently listed on my Etsy shop. For now, enjoy the wine stoppers in the photos below!

Thursday, February 10, 2011

Recipe Cards Come with the Territory

As I was cooking up another fabulous dinner the other night, it dawned upon me that there was something missing from my collection-- recipe cards! It seemed so obvious and I couldn't believe that I had not previously thought about designing some fun little cards to organize my recipes! Really it only seemed natural that this sort of thing should be created. So I spent a day home sick with a nasty sinus infection designing these quite stylishly modern recipe cards.

So far they have been a hit! I only listed them on my Etsy shop yesterday and I sold a set of the Avocado recipe cards and many people have expressed interest in them. They were really quite fun to design! With the avocado colored cards, I kept in mind colors of the kitchen (notably the greens and browns of the avocado). I like these the best of the two sets I created and am looking forward to designing more food color inspired recipe cards. I am thinking eggplant, butternut squash, strawberry, and other such rich and vibrant colors.


Last time I wrote about starting on a new set of wine corks. That is still in the works. It seems at times my creative juices begin flowing so much that I get caught up in new ideas. The wine corks will be made as I was happy with the original few that I made in December. It may just take a while longer than expected to get back on track with my project schedule! But in the end, I guess that is the fun of such creative endeavors-- the ability to stem from one project to the next. For now, I'll be designing more recipe cards tonight, and be using them in my kitchen tomorrow.

Thursday, January 27, 2011

Ah, Lazy Morning Coffee on a Snow Day


Honestly, there is nothing better than waking up in the morning to find that school has been cancelled due to snow. And the one thing that is better is waking up the second snowy morning to another email announcing a second snow day. I really am enjoying the extended ‘mini vacation,’ so to speak!

Back to sleep I go, but only for a short while as I am awakened an hour later by wet dog kisses from our energetic chocolate Labrador, Lilah. Somehow Lilah knows that she gets to spend another entire day with her mama and is just as excited as I am for this glorious snow day! I lumber to the downstairs of our row house in sweats and start in on cup-of-coffee-number-one. Part of enjoying my coffee is choosing the right mug to drink from, and today I have chosen a hand made mug thrown by potter Fred Driver. The mug was a ‘just because’ gift from my mom when I visited home in Indiana in late October, and it has quickly become one of my favorites. I own several other mugs by Fred and I don’t think there is a mug he could make that I wouldn’t like!

The breath-taking view from Rocky Mountain Coffee Roasters!
Today’s coffee is organic Mexican, a gift from my sister sent straight from her place of work—Rocky Mountain Coffee Roasters in Frisco, Colorado. Roasters, quite honestly, has some of the country’s best coffee. At first I thought that the coffee only tasted better because on the first tasting I was basking in the summer morning sun outside of their shop, taking in the fresh mountain air, and soaking in the amazing mountain view. However, upon tasting the coffee in Baltimore sans romanticized mountain-esque images, the coffee is pretty much just as amazing as it always is in Colorado!

As a former barista for seven years, I tend to consider myself a bit of a coffee lover (or some may say coffee snob) and hope, eventually, to open my own coffeehouse. It’s all part of my big 5-10 year plan. Coffee is a huge deal for me as you can see and so when I moved to Baltimore, finding the perfect coffeehouse was a number one priority.

Perhaps my favorite place to get coffee in Baltimore is a café in the Federal Hill neighborhood called Spoons. Spoons is a fabulous coffeehouse and café which serves freshly prepared food with organic and local ingredients, and their coffee is absolutely fantastic! Unfortunately, I don’t make it to Spoons enough for coffee because they are a drive away. They have become a favorite for brunch or lunch as their sandwiches and salads are always spectacular.  And during the oppressively hot and humid Baltimore summer, I have been known to drive across the city just to pop in for an iced coffee. I am pretty sure they brew the best iced coffee known to man!

During the summer months, we often shop on Sunday mornings at the Baltimore Farmers' Market. Shopping for fresh fruit and produce that is in season becomes more enjoyable with a cup of Zeke’s Coffee in hand. While Zeke’s has a retail location, I don’t make it there often because it is in a different neighborhood that is a bit out of the way.

For my own convenience, I usually grab my coffee from our neighborhood coffeehouse, Patterson Perk. Cleverly named because of its location across from Patterson Park (and maybe perhaps stealing the idea from Friends Central Perk), the Perk is a tiny little coffeehouse in a corner row house. While indoor seating isn’t ideal, the outdoor seating is suitable for spring, summer, and fall. The Perk is dog friendly and so it becomes the perfect stop-off on a summer weekend morning dog walk with Lilah.  In fact, Lilah loves the place so much that she now dashes up the front stoop toward the door every time we pass on a walk, whether or not we intend on grabbing a cup of joe. “Silly girl!” we exclaim. “We’re not going to get coffee today!” Labs are incredibly smart and she must certainly remember the tasty dog treats the Perk gives their loyal canine customers!

And while my second cup of coffee of the morning comes to an end, I have been inspired to continue sharing my favorite coffeehouse around the world. I will certainly share more of my favorites in the future! But for now, I leave you with a silly little coffee cinquain poem that I wrote with my students in class last week.

Coffee
Creamy, smooth
Brewing, steaming, sipping
Oh so very tasty!
Latte
Related Posts Plugin for WordPress, Blogger...